How to Join Tempuria Evolved
Follow these simple steps to start your adventure on our server!
Easy Way to Install Tempuria (CurseForge)
This is the recommended and easiest method to get started with Tempuria Evolved.
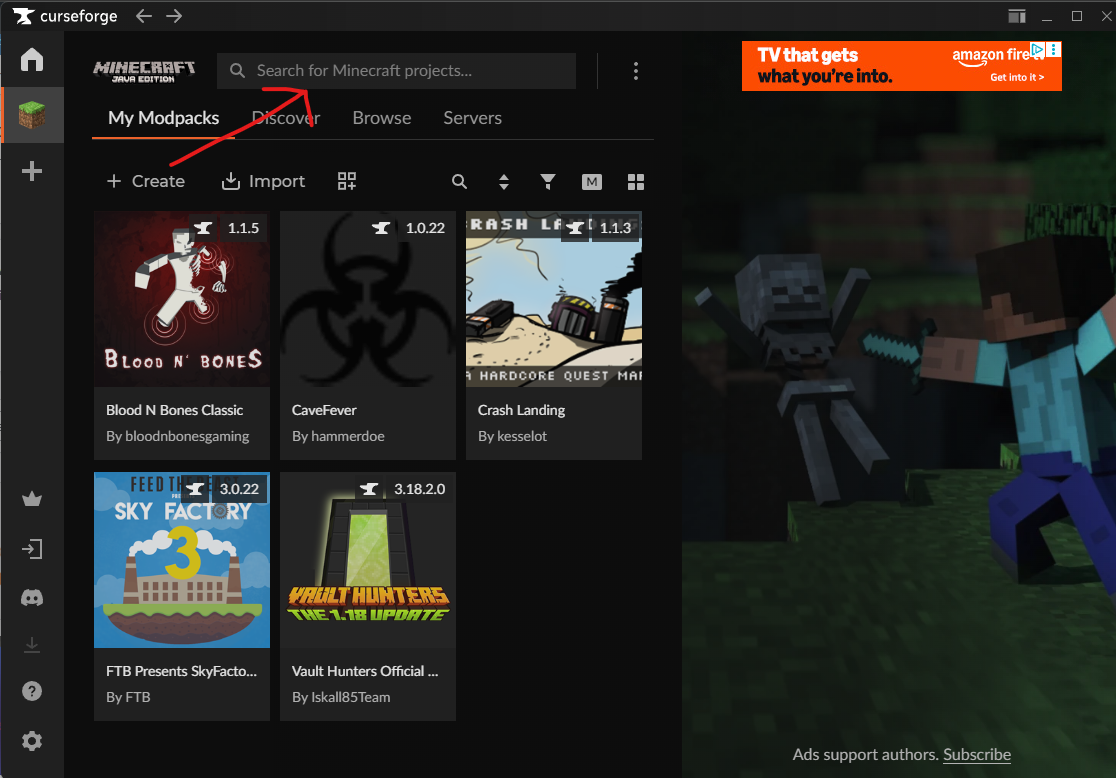
Step 1: Open CurseForge to This Area
Launch CurseForge and ensure you are in the Minecraft section, ready to browse modpacks.
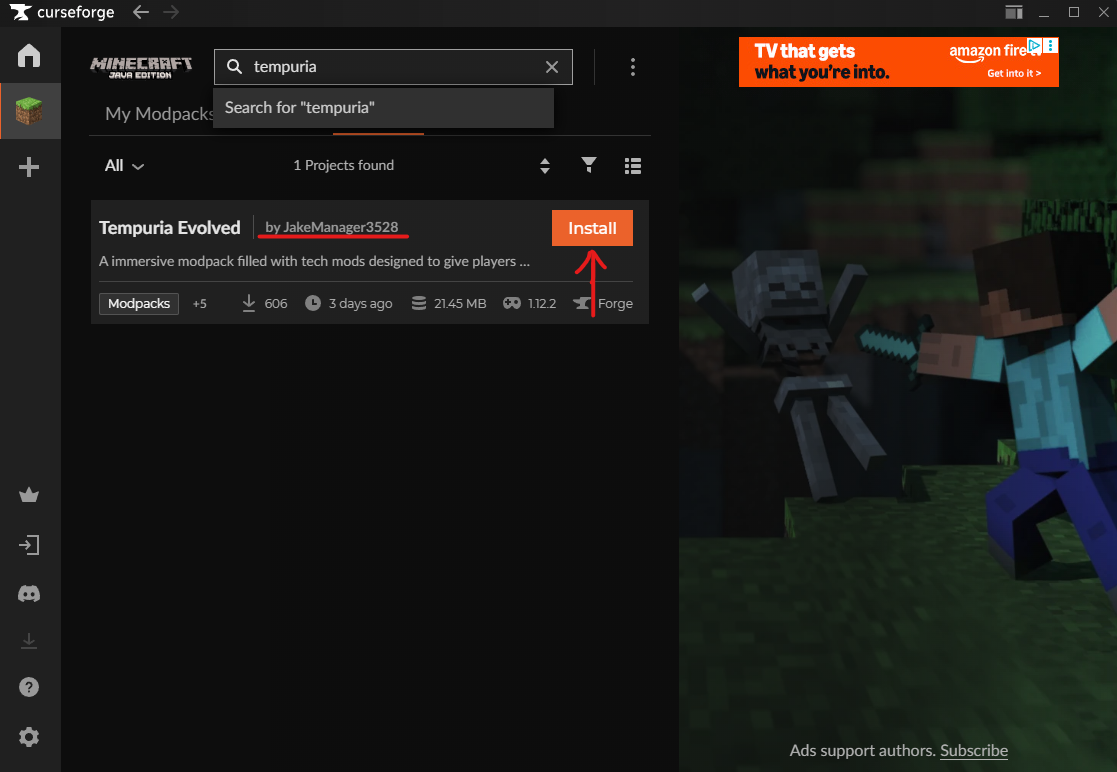
Step 2: Search for Tempuria Mod
Use the search bar within CurseForge to find "Tempuria Evolved" in the modpacks section.
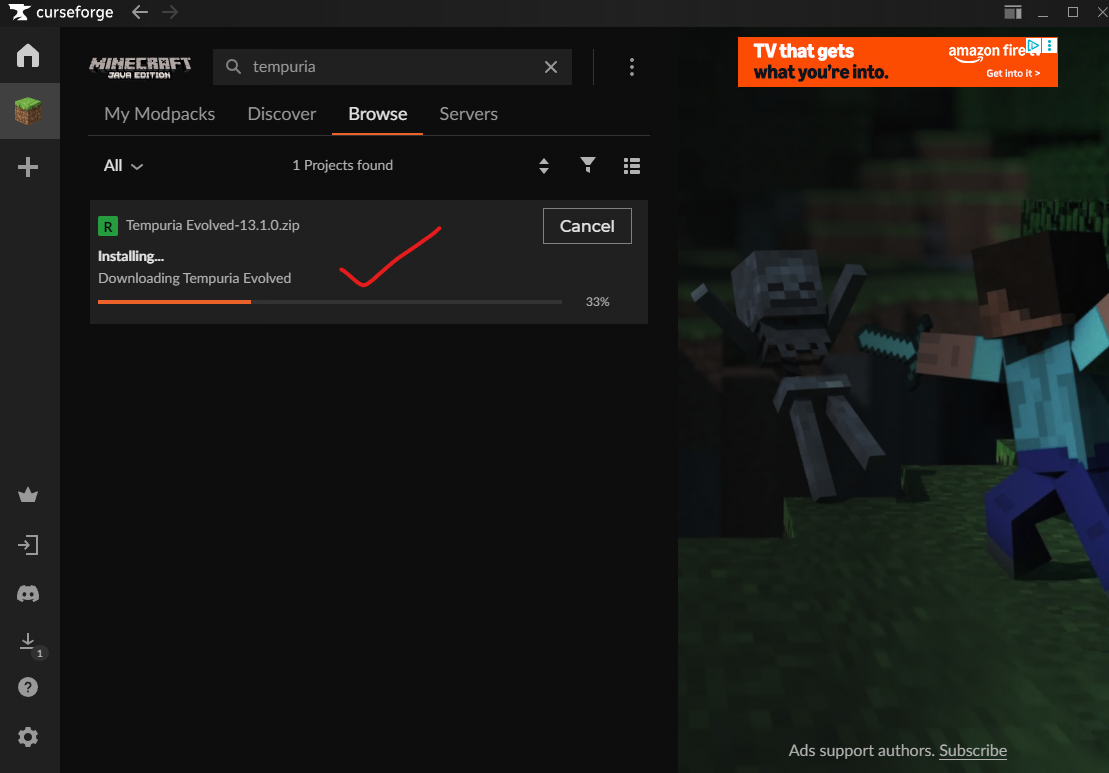
Step 3: Download
Click the "Install" button on the Tempuria Evolved modpack page to begin the download and automatic installation.
Step 3.1: Join Our Discord
Join our Discord community to stay updated and connect with other players.
Join Our Discord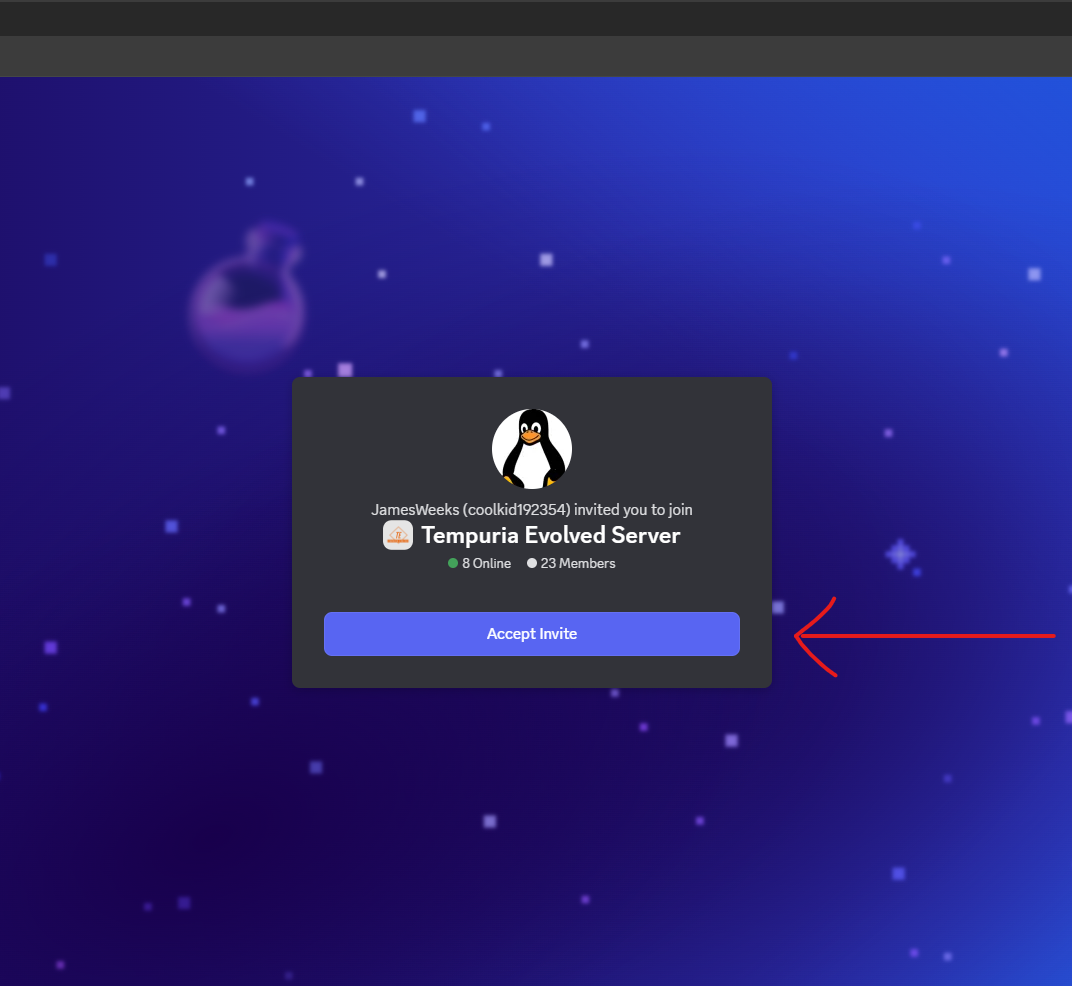
Step 3.2: Get Whitelisted
Go into the #whitelist chat channel and send your Minecraft username. You'll know you've been whitelisted since you will receive a reaction of a 👍 thumbs up emoji on your message.
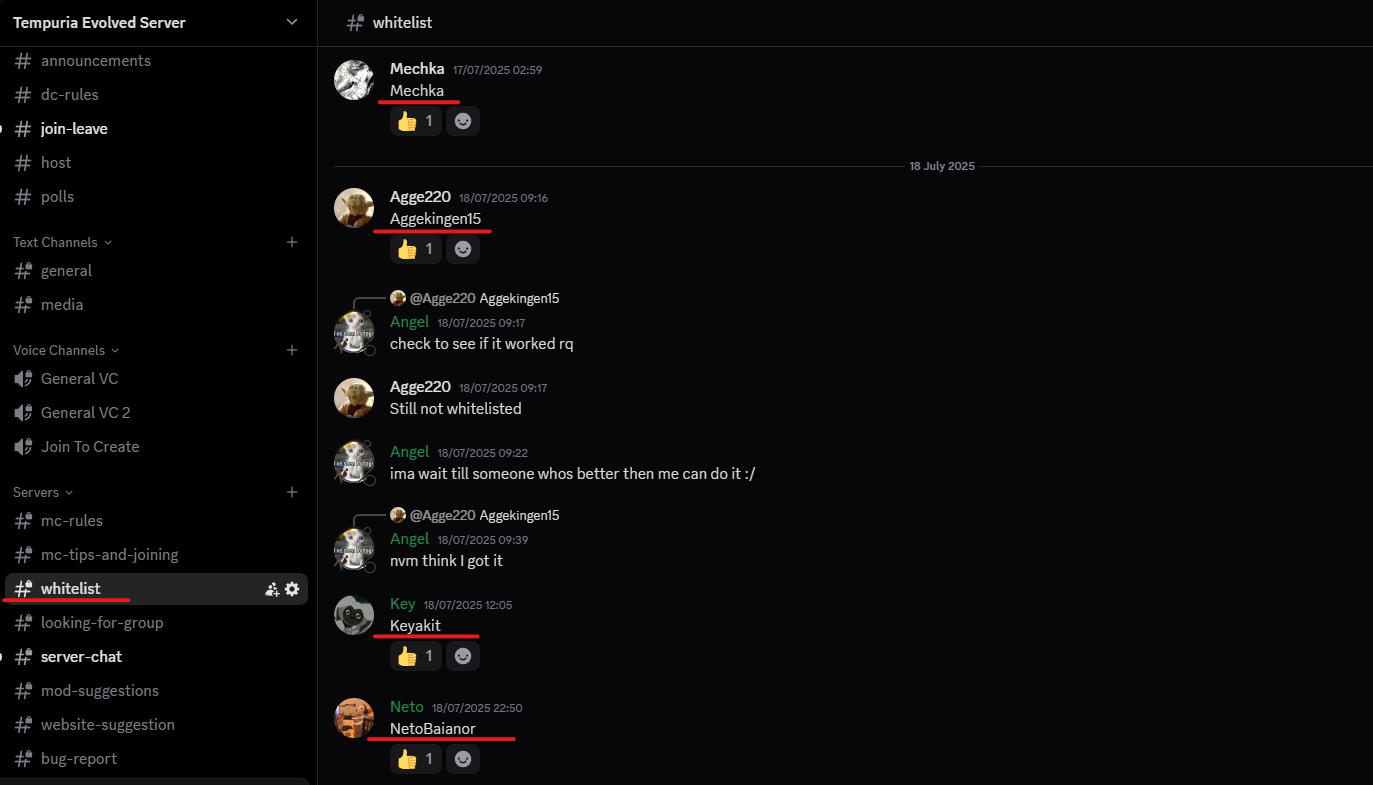
Step 4: Click Play on Tempuria
Once the installation is complete, click the "Play" button within CurseForge for Tempuria Evolved to launch Minecraft.
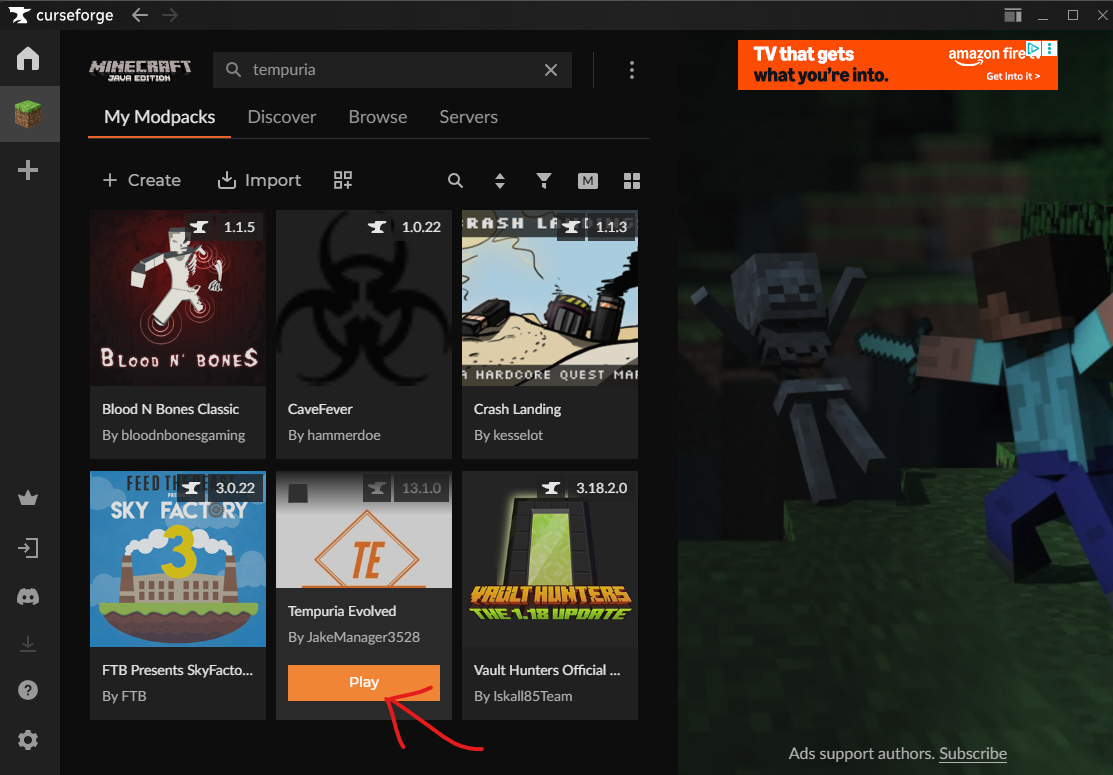
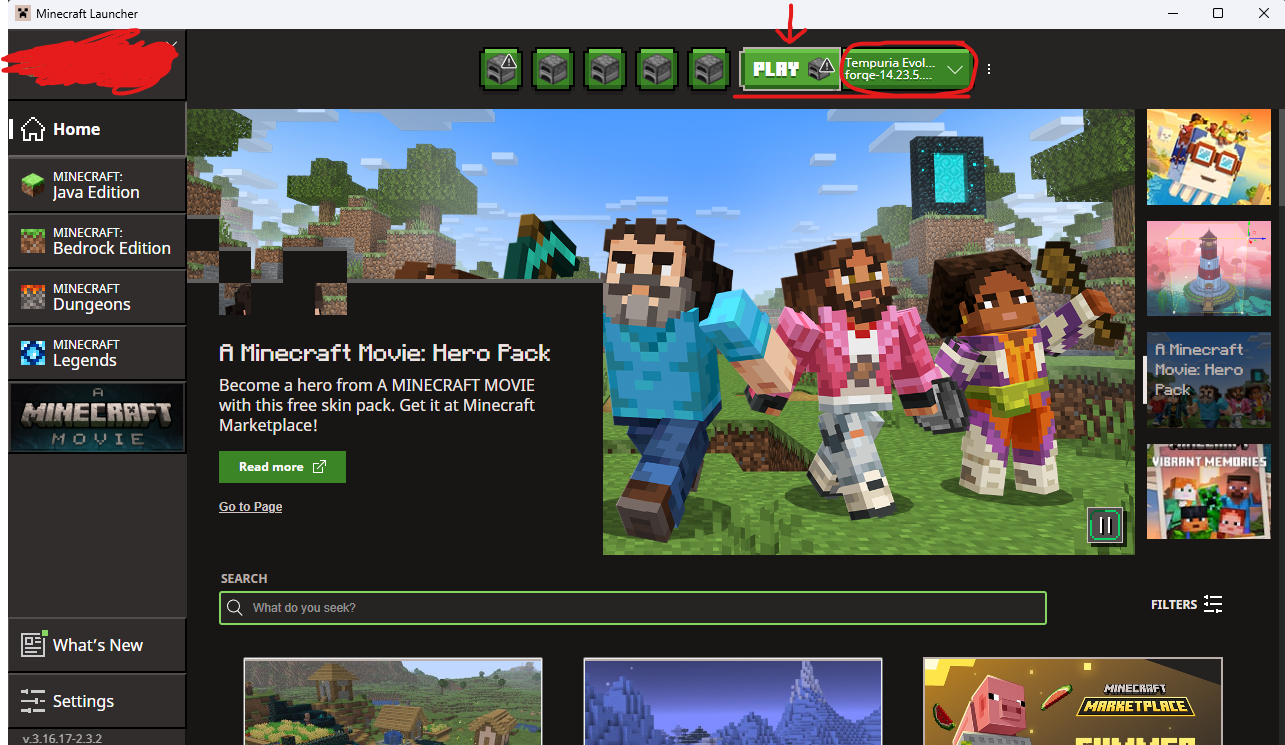
Step 4.1: Minecraft Launcher Opening
The Minecraft launcher will open. Make sure the correct mod pack (Tempuria Evolved) is selected before you proceed to play.
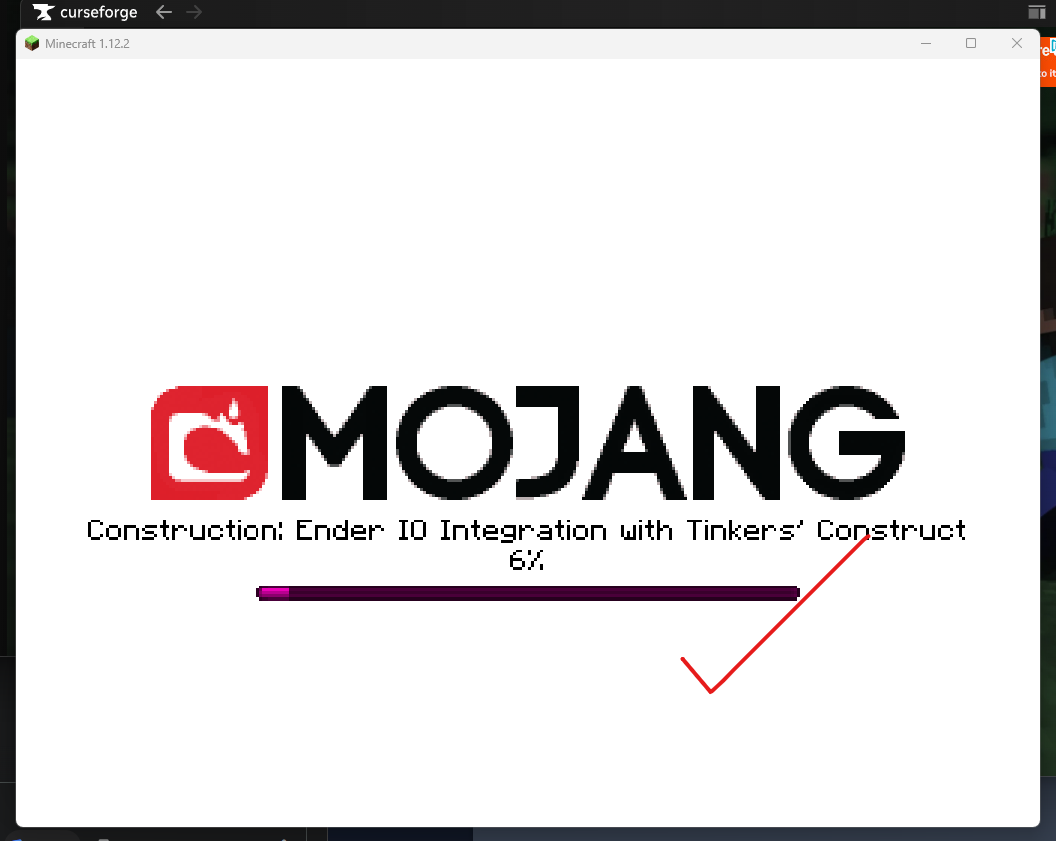
Step 5: Wait for Mods to Load
Minecraft will now load all the necessary mods. This might take a few moments due to the large number of mods in the pack.
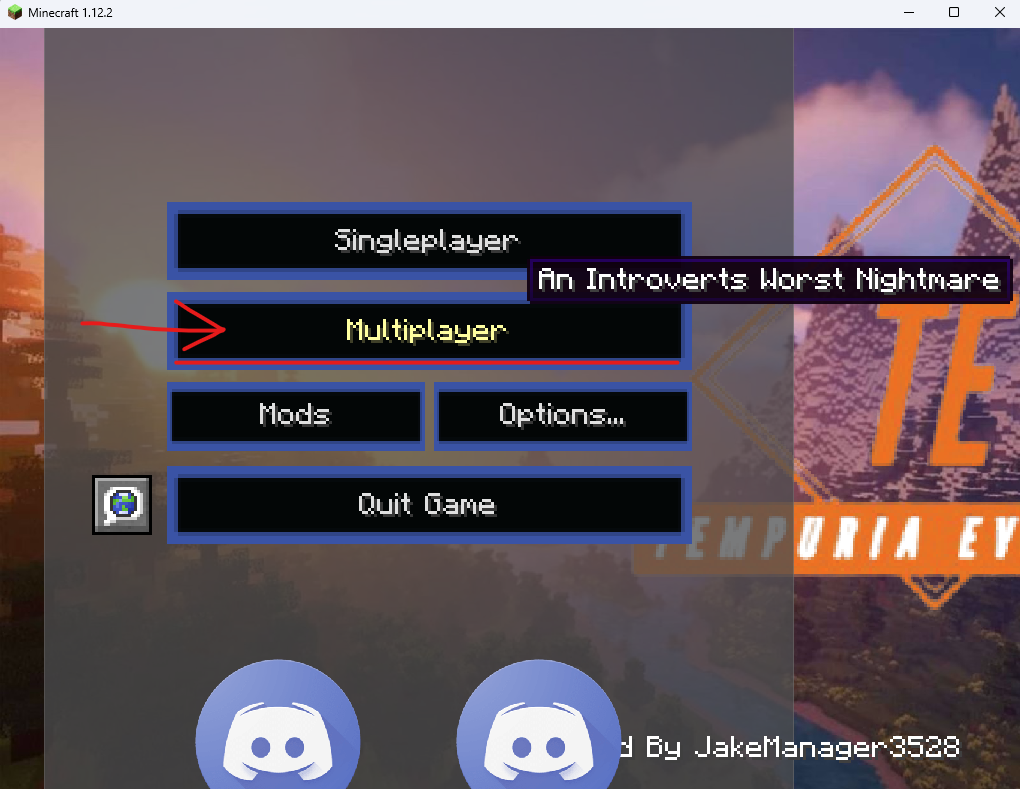
Step 6: Click on Multiplayer
Once Minecraft has fully loaded, navigate to the 'Multiplayer' option from the main menu.
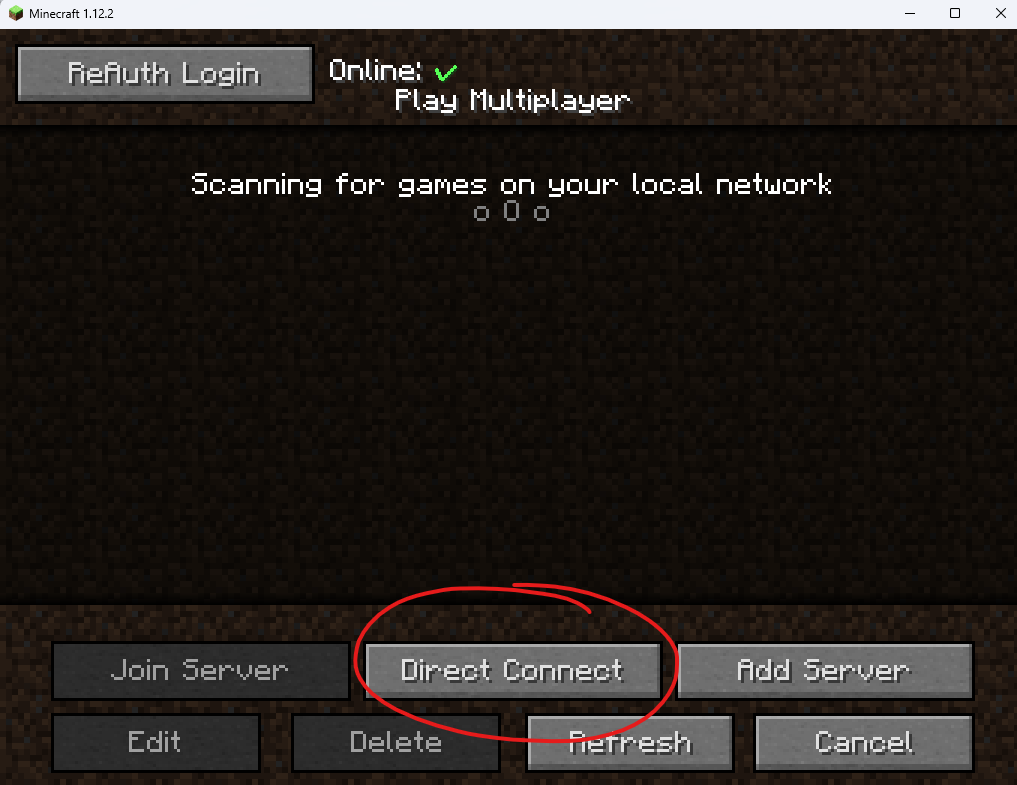
Step 7: Direct Connect or Add Server
In the Multiplayer screen, you can either click 'Add Server' to save our server to your list, or 'Direct Connection' for a one-time join.
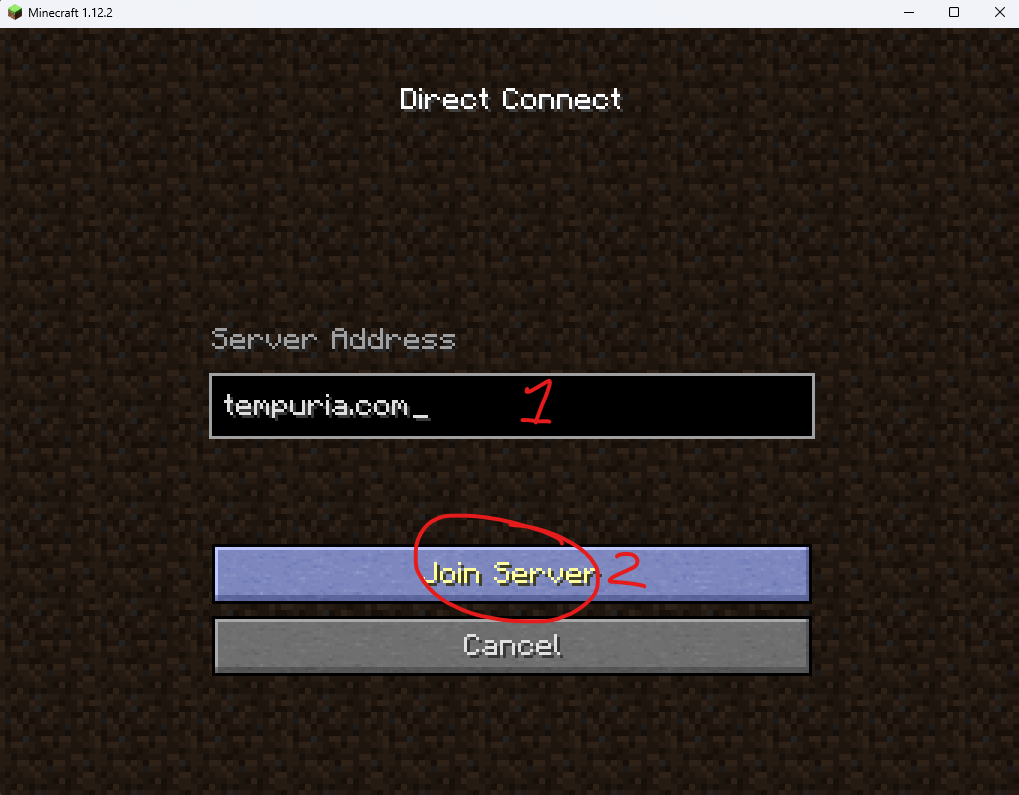
Step 8: Connect to Server Using tempuria.com
Enter tempuria.com into the 'Server Address' field and click 'Done' or 'Join Server'.
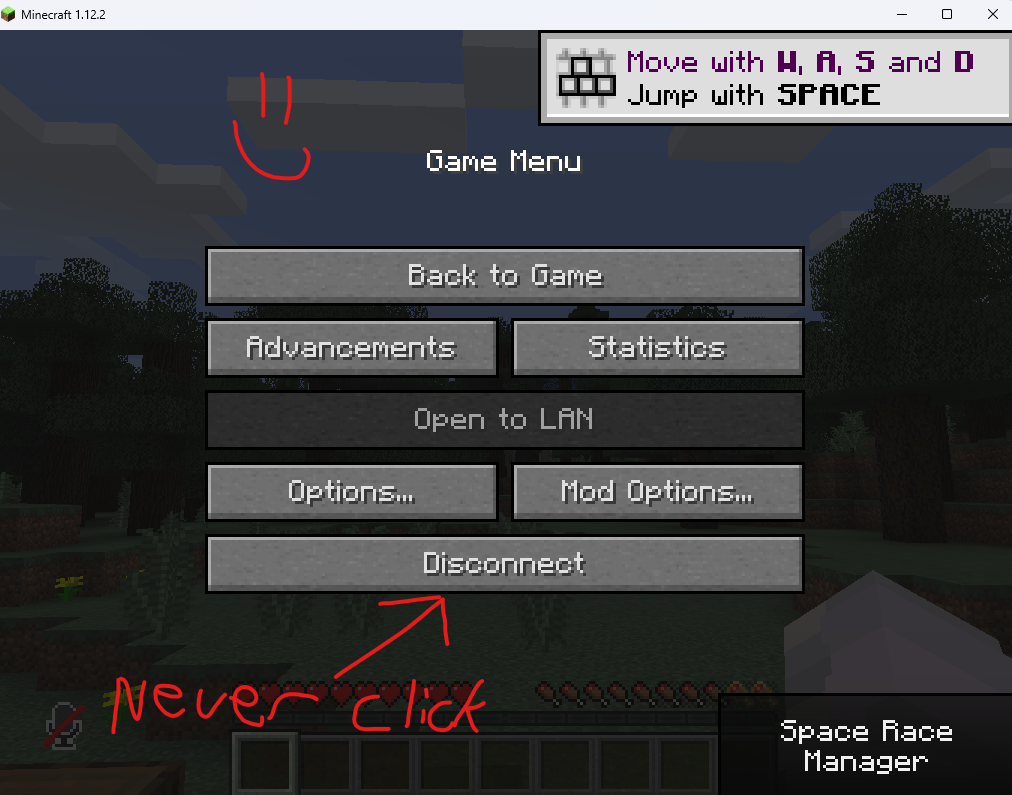
Step 9: Now Have Fun!
You're connected! Enjoy your time on Tempuria Evolved and explore all that our modded server has to offer.
Harder Way to Install Tempuria (CurseForge, only do this if easy way is bugged)
This section provides an alternative installation method in case the primary method encounters issues.
Step 1: Download Our Modpack
Use CurseForge and download our modpack from here.
Download Modpack Here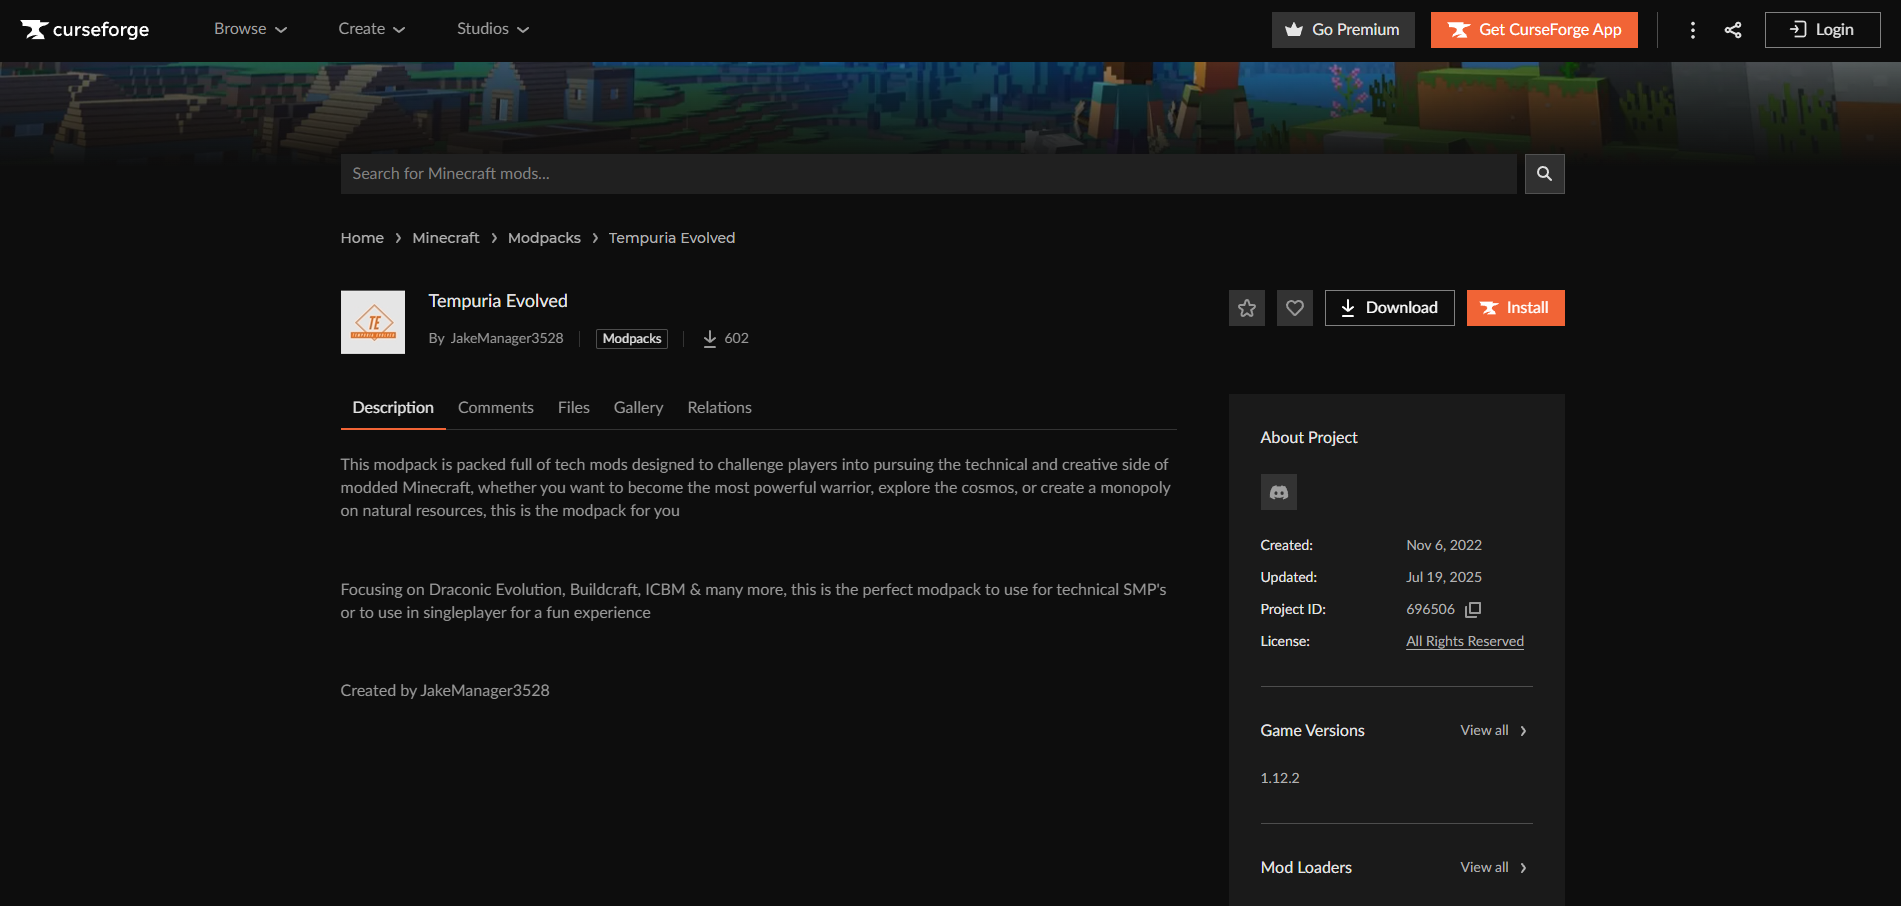
Step 2: Add the Modpack to Your Library
Then add the modpack to your library by importing it.
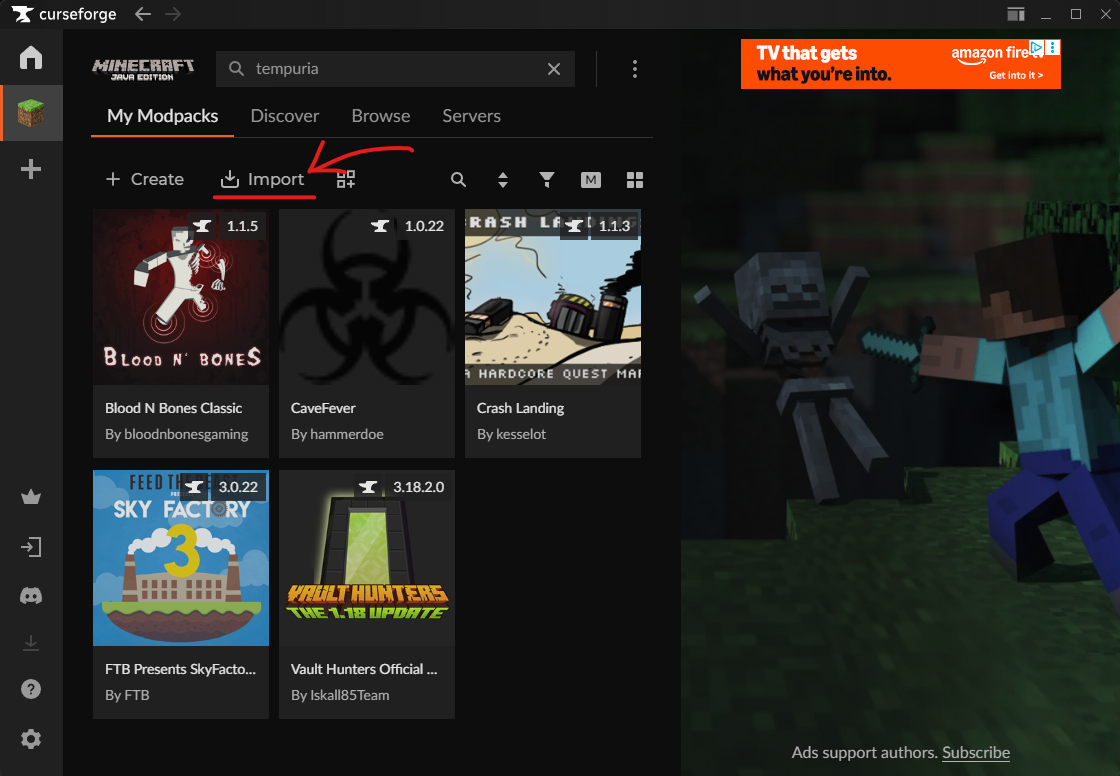
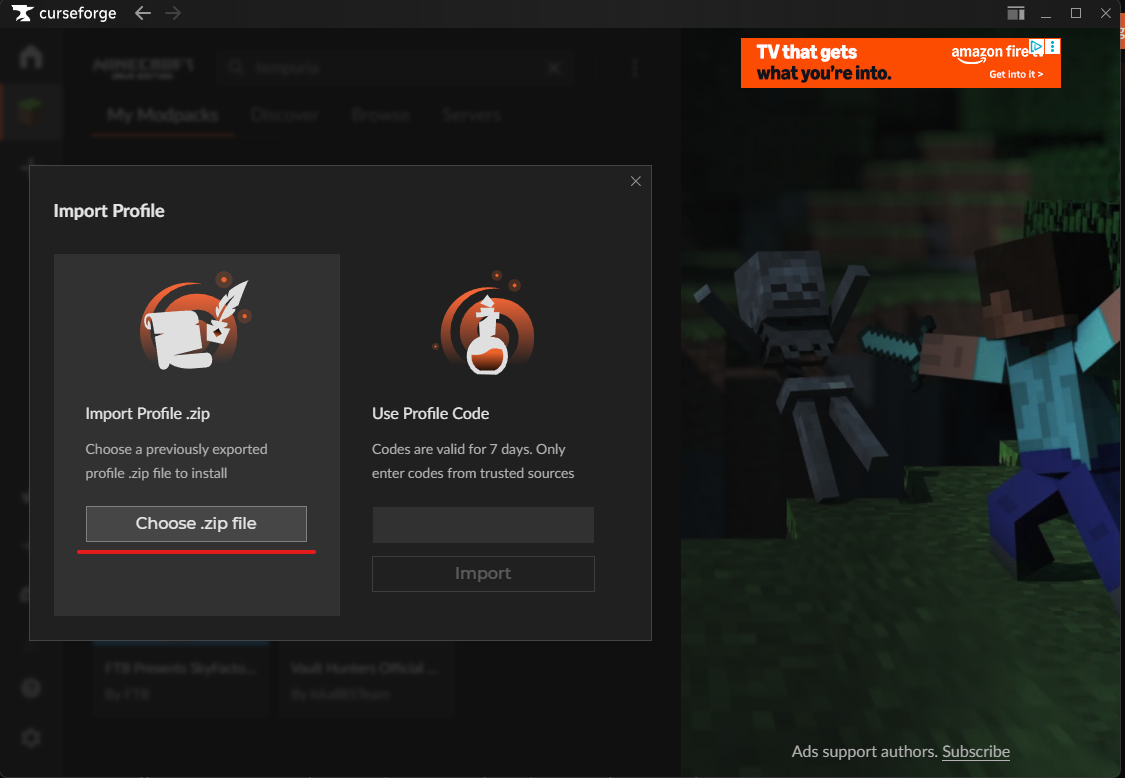
Step 2.1: Choose Zip
When importing, choose the 'Zip' option.
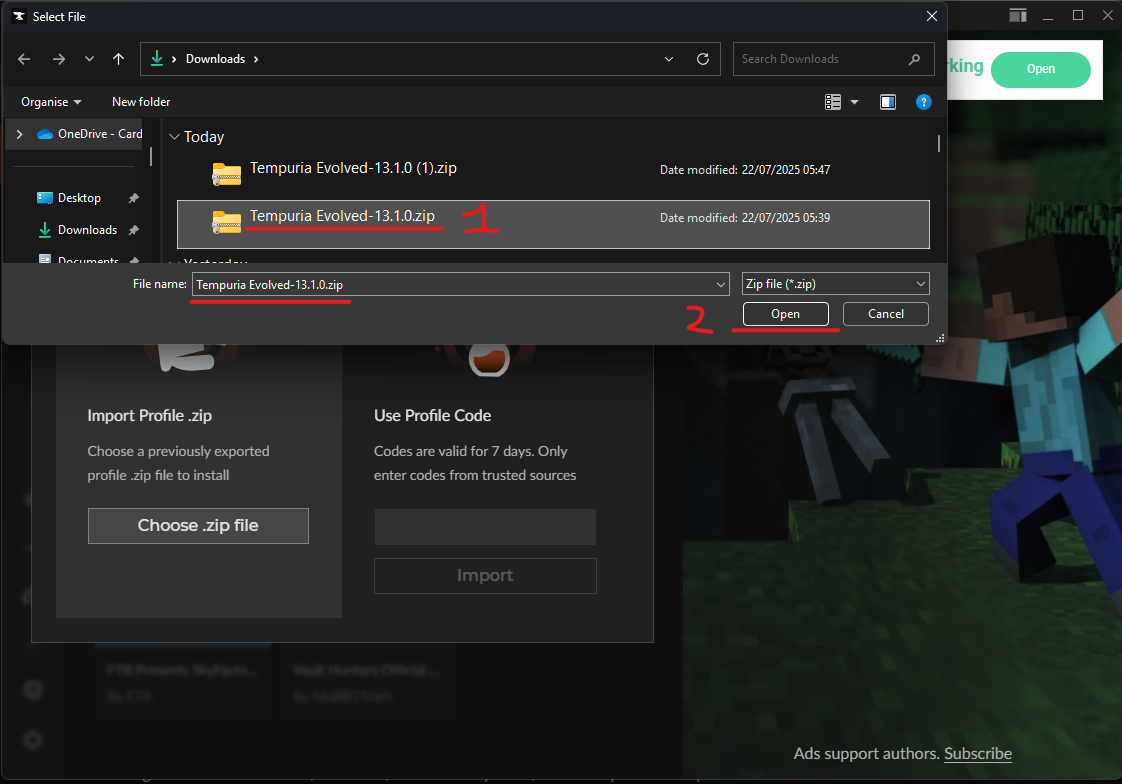
Step 2.2: Select Tempuria Evolved Modpack
Select the downloaded Tempuria Evolved Modpack file.
Step 2.3: Installing
The modpack should now install automatically.
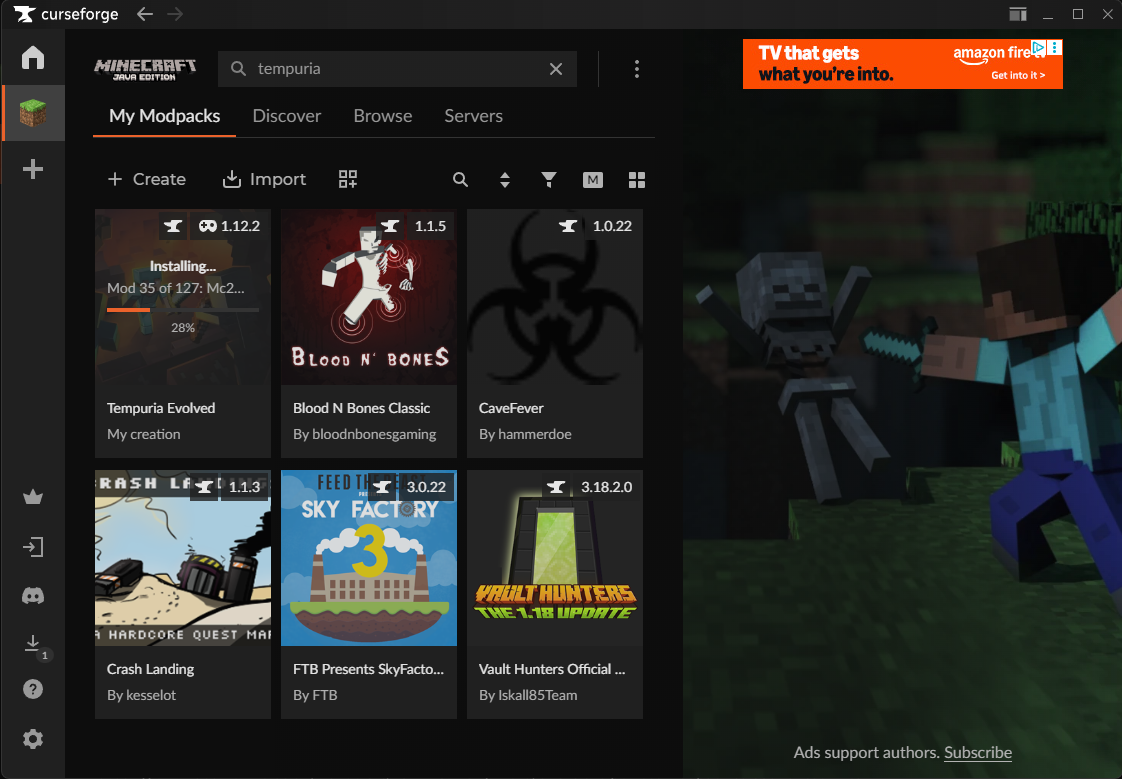
Step 2.4: Installation Complete
The modpack installation is now complete!
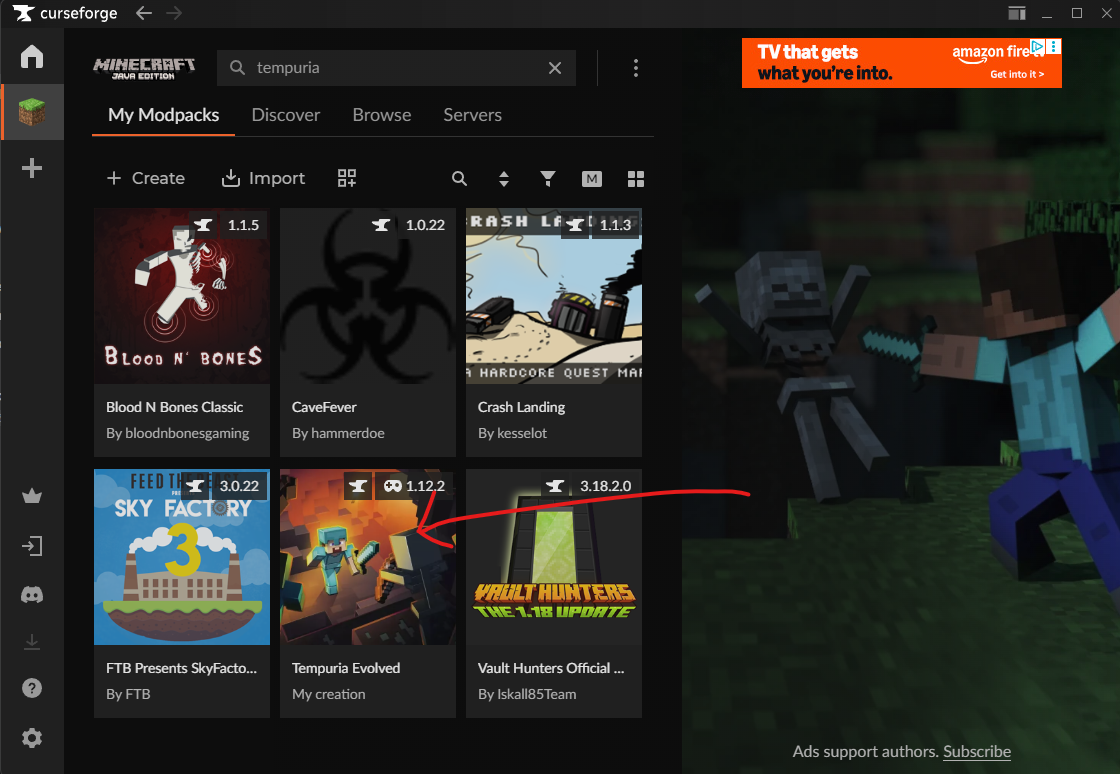
Step 3: Join Our Discord
Join our Discord community to stay updated and connect with other players.
Join Our Discord
Step 4: Get Whitelisted
Go into the #whitelist chat channel and send your Minecraft username. You'll know you've been whitelisted since you will receive a reaction of a 👍 thumbs up emoji on your message.

Step 5: Launch the Modpack
Once whitelisted, click 'Play' on the Tempuria Evolved mod pack within CurseForge to launch Minecraft.
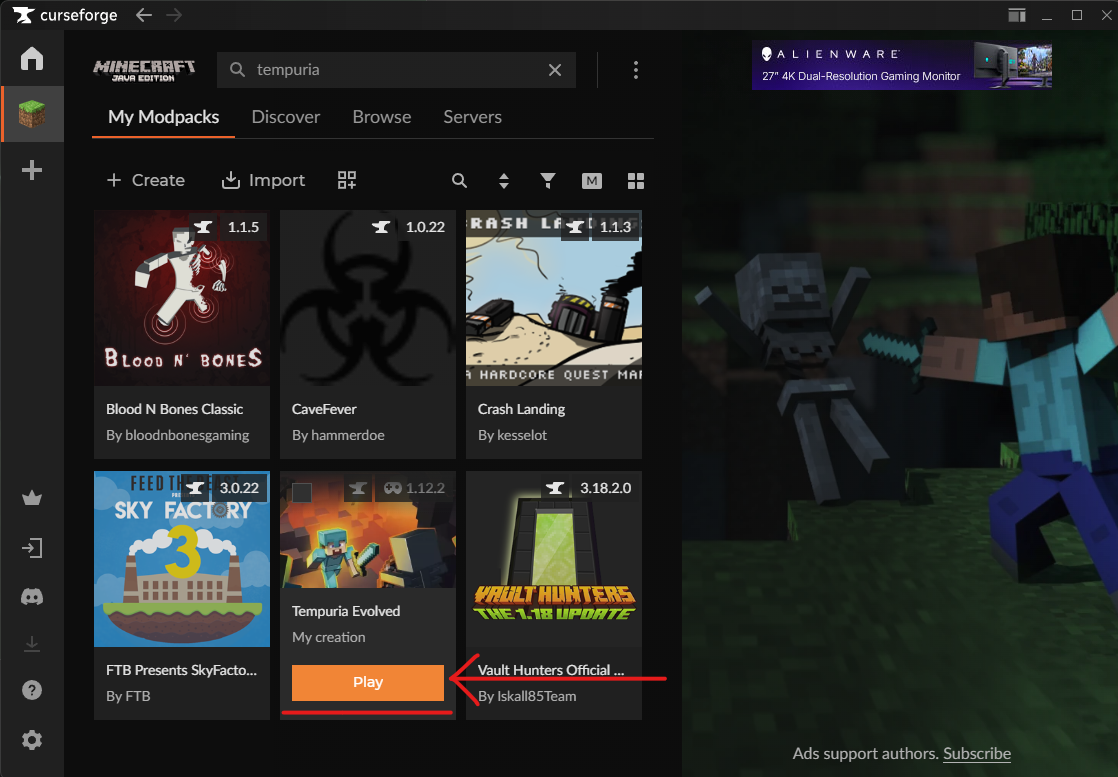
Step 5.1: Minecraft Launcher
The Minecraft launcher will open. Make sure it's the correct mod pack selected before proceeding.

Step 5.2: Loading Mods
Now the mods will load. This will take a little bit since we use a lot of mods.

Step 6: Connect to the Server
In Minecraft, navigate to 'Multiplayer'.

Step 6.1: Add Server
Then click 'Add Server' or 'Direct Connection'.

Step 6.2: Enter Server IP/Domain
For Server Address, enter our IP/Domain: tempuria.com and click 'Join'.

Step 7: Enjoy Your Time!
That's it! You're all set to enjoy your time on Tempuria Evolved. We can't wait to see you in-game!

How to Install Tempuria on AT Launcher
Follow these steps to install Tempuria Evolved using the AT Launcher.
Step 1: Add New Instance
Open AT Launcher and click on "Add New Instance" or "Packs".
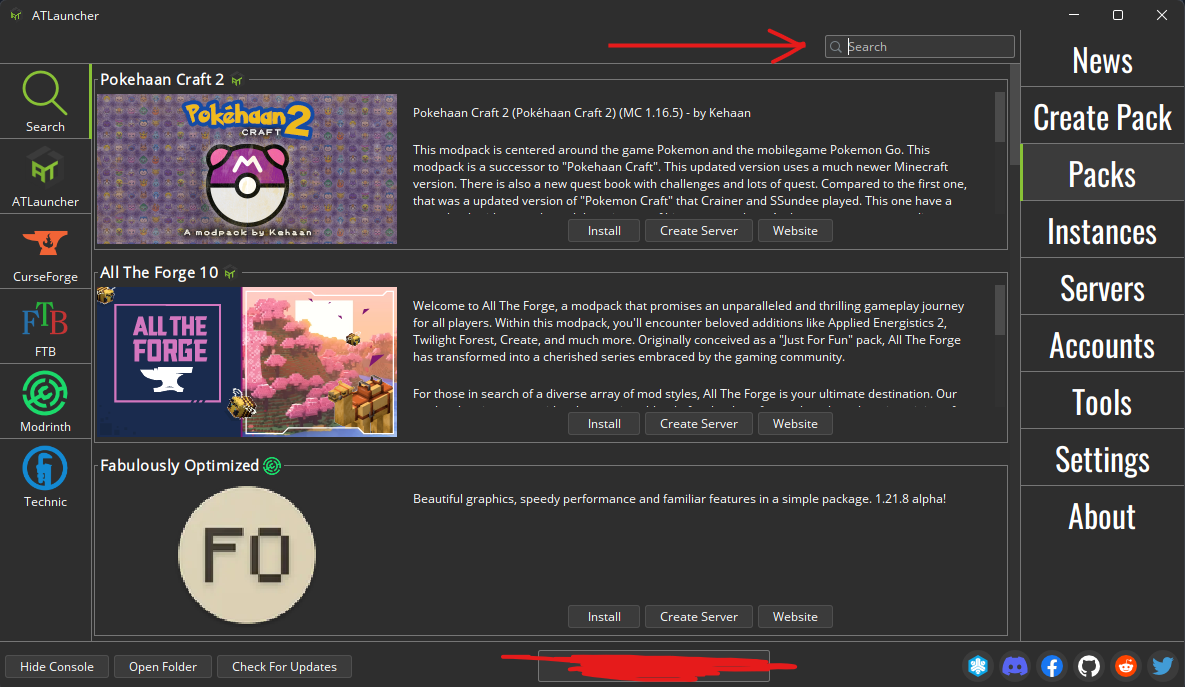
Step 2: Search for Tempuria
Search for "Tempuria Evolved" in the available modpacks list within AT Launcher.
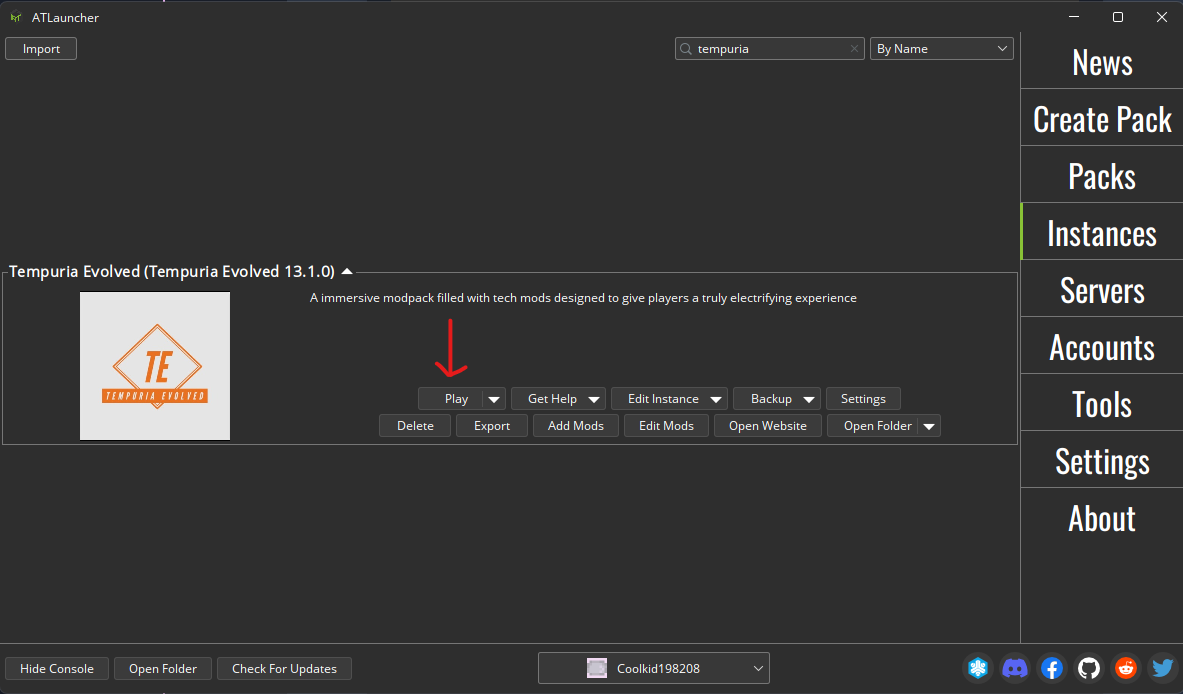
Step 3: Install Modpack
Select Tempuria Evolved and click "Install" to download and set up the modpack. Make sure it's on the most recent version.
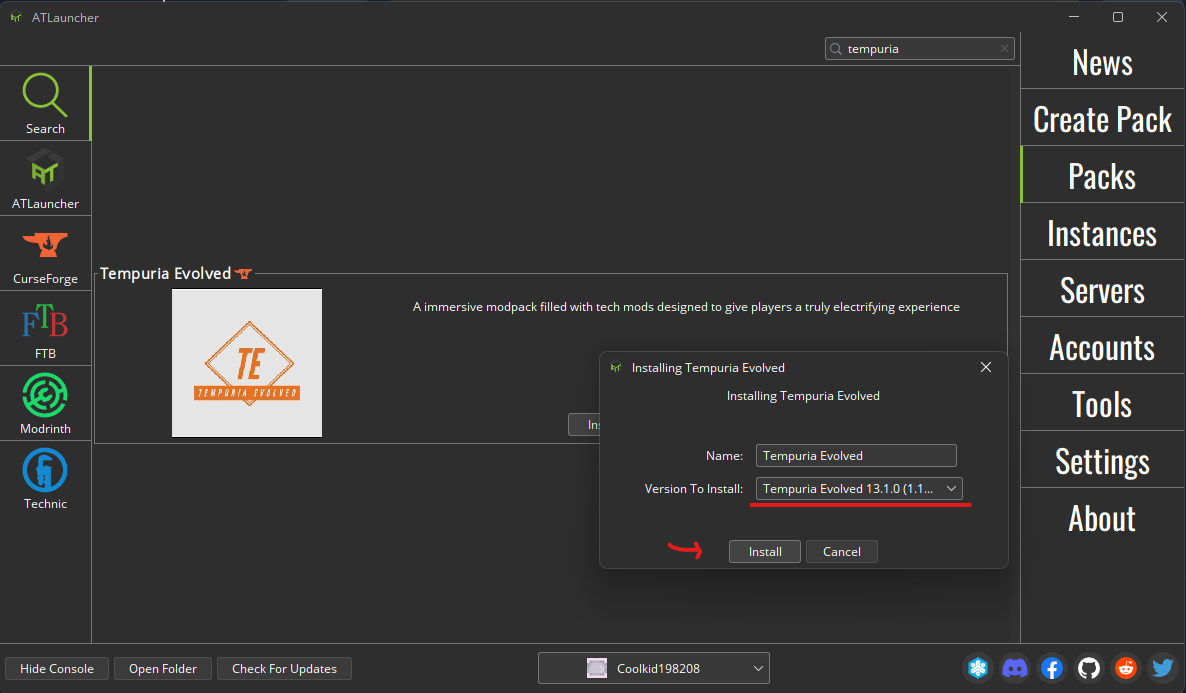
Step 4: Launch Game
Once installed, launch the game from the AT Launcher.

Step 4.1: Click on Multiplayer
Once Minecraft has fully loaded, navigate to the 'Multiplayer' option from the main menu.

Step 4.2: Join using Direct Connect or Add Server
In the Multiplayer screen, you can either click 'Add Server' to save our server to your list, or 'Direct Connection' for a one-time join.

Step 5: Connect to Server Using tempuria.com
Enter tempuria.com into the 'Server Address' field and click 'Done' or 'Join Server'.

Step 6: Now Have Fun!
You're connected! Enjoy your time on Tempuria Evolved and explore all that our modded server has to offer.

How to Install Tempuria on Prism Launcher
Follow these steps to install Tempuria Evolved using Prism Launcher.
Step 1: Open Prism Launcher
Launch Prism Launcher and click on "Add Instance".
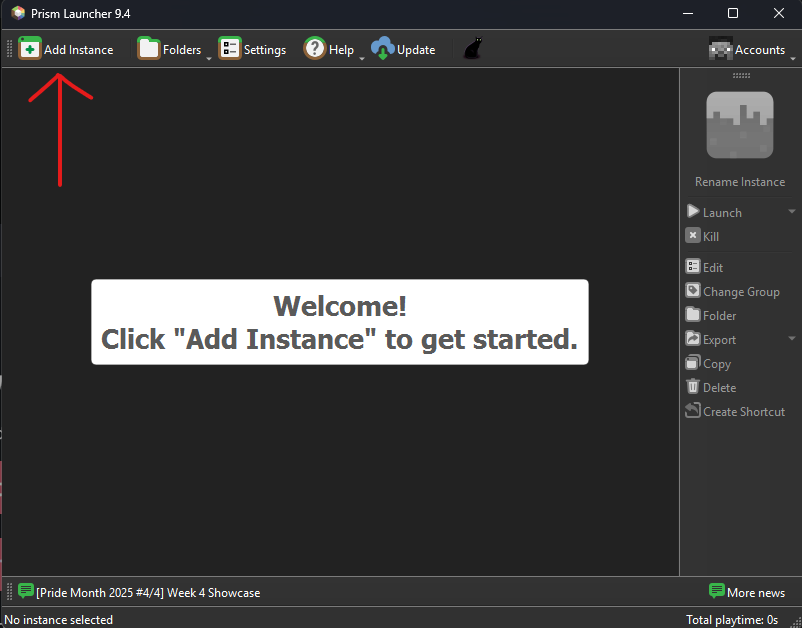
Step 2: Go to CurseForge section
Navigate to the CurseForge section within Prism Launcher, search for "Tempuria Evolved", select the pack, and confirm.
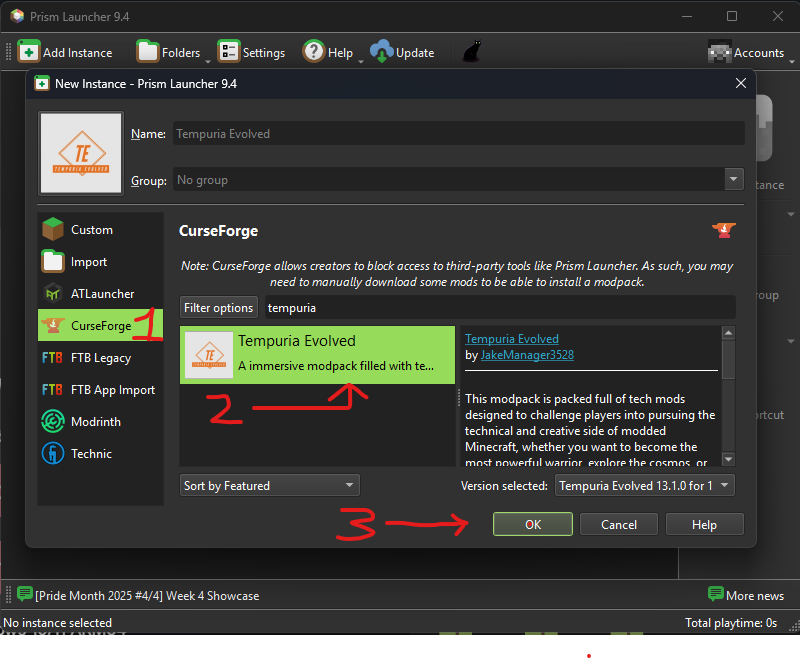
Step 3: Select Tempuria and click launch.
Once Tempuria Evolved is installed, select it from your instances and click the "Launch" button.
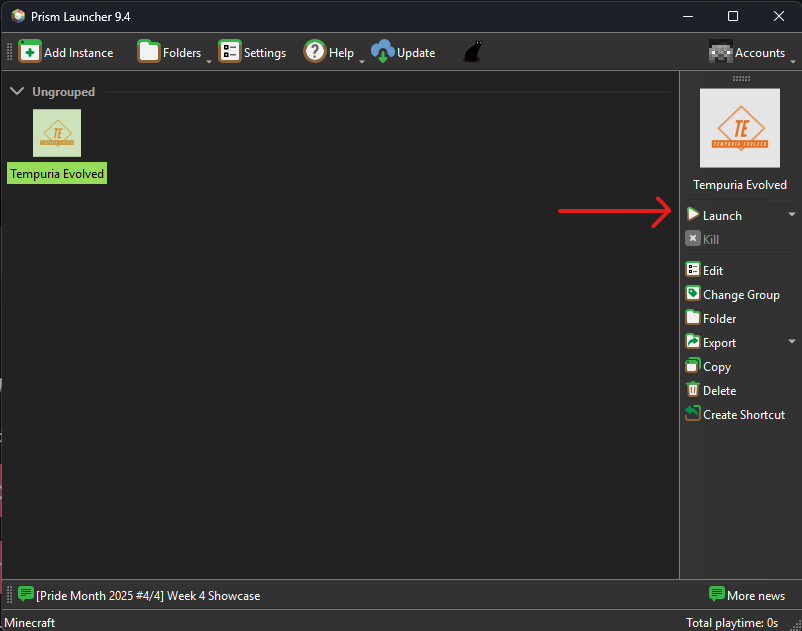
Step 4: Minecraft should just launch and will load up all the mods.
The Minecraft launcher will open, and the game will automatically begin loading all the necessary mods. This might take a few moments.

Step 5: Select Multiplayer
Once Minecraft has fully loaded, navigate to the 'Multiplayer' option from the main menu.

Step 6: Click on Add Server or Direct Connect
In the Multiplayer screen, you can either click 'Add Server' to save our server to your list, or 'Direct Connection' for a one-time join.

Step 7: Use our IP/Domain to connect
Enter our IP/Domain: tempuria.com into the 'Server Address' field and click 'Done' or 'Join Server'.

Step 8: Enjoy Your Time!
You're connected! Enjoy your time on Tempuria Evolved and explore all that our modded server has to offer.

If you encounter any issues or have questions, don't hesitate to reach out on our Discord!
Join Our DiscordFeeling hungry?
00100000 00110011 00110101 00110011 00100000 01000111 01110010 01100001 01101110 01100100 00100000 01000001 01110110 01100101 00101100 00100000 01000011 01100001 01110010 01100100 01101001 01100110 01100110 00100000 01000011 01000110 00110101 00100000 00110100 01010011 01000100